Tuesday, May 23, 2017

Disable modern experience for a site collection in SharePoint Online

The post helps you to disable modern experience in SharePoint online at the site collection level or at the web level, it is only settable by CSOM/PowerShell.

Below is the powershell script for the same. It will popup for entering parameters and you are good to go with that, This script let you enable/disable the experience based on your inputs.

function Set-NewExperience{
 
 
    Begin{

$Url = Read-Host -Prompt "Enter web url:"
    $username = Read-Host -Prompt "Enter Username:"
    $password = Read-Host -Prompt "Enter password" -AsSecureString
$Scope = Read-Host -Prompt "Enter scope Site/Web:"
$State = Read-Host -Prompt "Enter scope Disable/Enable:"
    $context = New-Object Microsoft.SharePoint.Client.ClientContext($Url)
    $credentials = New-Object Microsoft.SharePoint.Client.SharePointOnlineCredentials($username, $password)
    $context.Credentials = $credentials
    }
    Process{

        if($Scope -eq "Site"){
            # To apply the script to the site collection level, uncomment the next two lines.
            $site = $context.Site
            $featureguid = new-object System.Guid "E3540C7D-6BEA-403C-A224-1A12EAFEE4C4"
        }
        else{
            # To apply the script to the website level, uncomment the next two lines, and comment the preceding two lines.
            $site = $context.Web
            $featureguid = new-object System.Guid "52E14B6F-B1BB-4969-B89B-C4FAA56745EF"
        }
        if($State -eq "Disable")
        {
            # To disable the option to use the new UI, uncomment the next line.
            $site.Features.Add($featureguid, $true, [Microsoft.SharePoint.Client.FeatureDefinitionScope]::None)
            $message = "New library experience has been disabled on $URL"
        }
        else{
            # To re-enable the option to use the new UI after having first disabled it, uncomment the next line.
            # and comment the preceding line.
            $site.Features.Remove($featureguid, $true)
            $message = "New library experience has been enabled on $URL"
        }
        try{
            $context.ExecuteQuery()
            write-host -ForegroundColor Green $message
        }
        catch{
            Write-Host -ForegroundColor Red $_.Exception.Message
        }
    }
    End{
        $context.Dispose()  
    }
}

Set-NewExperience

Monday, May 22, 2017

Hide Ribbon in SharePoint Online using JS Link

Create a new js file and name it as DetailsView.js. Add the below script to it


window.onload = function () {

if (window.location.href.indexOf("user.aspx?obj") > -1) {

document.getElementById('Ribbon.Permission.Manage.Inherit-Large').style.display = "none";

}
};

upload it to a cdn location.

Here I'm hiding the Delete Unique Permissions Ribbon element from lists/libraries permission page. You can change code based on your ribbon id.


Below is the powershell to add the above js file as a link to SharePoint online site.

Add-Type -Path "c:\Program Files\Common Files\microsoft shared\Web Server Extensions\16\ISAPI\Microsoft.SharePoint.Client.dll"
Add-Type -Path "c:\Program Files\Common Files\microsoft shared\Web Server Extensions\16\ISAPI\Microsoft.SharePoint.Client.Runtime.dll"
Add-Type -Path "c:\Program Files\Common Files\microsoft shared\Web Server Extensions\16\ISAPI\Microsoft.SharePoint.Client.Publishing.dll"

# Authenticate with the SharePoint site.
#
$actionName = "EM_SPO_ZIN_JS_Injection"
$actionType = "ScriptLink"
$actionSourceFile ="https://cdnpath/Detailsview.js"


$siteUrl = Read-Host -Prompt "Enter web url:"
$username = Read-Host -Prompt "Enter Username:"
$password = Read-Host -Prompt "Enter password" -AsSecureString
$ctx = New-Object Microsoft.SharePoint.Client.ClientContext($siteUrl)

# SharePoint Online
$credentials = New-Object Microsoft.SharePoint.Client.SharePointOnlineCredentials($username, $password)
$ctx.Credentials = $credentials

$rootWeb = $ctx.Web
$ctx.Load($rootWeb)
$actions = $rootWeb.get_userCustomActions()
$ctx.Load($actions)
$ctx.ExecuteQuery()
if($actions)
{
$actionsToDelete = @()

foreach($action in $actions)
{
if($action.get_description() -eq $actionName -and $action.get_location() -eq $actionType) {

Write-Host "Action found:" $action.get_description() -foregroundcolor white -backgroundcolor Green
$actionsToDelete += $action

}
}

foreach($actionToDelete in $actionsToDelete) {
    $actionToDelete.deleteObject()
Write-Host "Action deleted" -foregroundcolor white -backgroundcolor Green
}
$ctx.ExecuteQuery()
}


Write-Host "Installing action"  -foregroundcolor white -backgroundcolor Green
$newAction = $actions.add();
$newAction.set_description($actionName);
$newAction.set_location('ScriptLink');
$scriptBlock = 'var headID = document.getElementsByTagName("head")[0];var newScript = document.createElement("script");newScript.type = "text/javascript";newScript.src="';
$scriptBlock += $actionSourceFile + '?ver=' + (Get-Date);
$scriptBlock += '";headID.appendChild(newScript);';
$newAction.set_scriptBlock($scriptBlock);
$newAction.update();
$ctx.ExecuteQuery();

Write-Host "Action" $newAction.Description "installed" -foregroundcolor white -backgroundcolor Green

Powershell to add JS Link in SharePoint Online

Add-Type -Path "c:\Program Files\Common Files\microsoft shared\Web Server Extensions\16\ISAPI\Microsoft.SharePoint.Client.dll"
Add-Type -Path "c:\Program Files\Common Files\microsoft shared\Web Server Extensions\16\ISAPI\Microsoft.SharePoint.Client.Runtime.dll"
Add-Type -Path "c:\Program Files\Common Files\microsoft shared\Web Server Extensions\16\ISAPI\Microsoft.SharePoint.Client.Publishing.dll"

# Authenticate with the SharePoint site.
#
$actionName = "EM_SPO_ZIN_JS_Injection"
$actionType = "ScriptLink"
$actionSourceFile ="https://cdnpath/Detailsview.js"


$siteUrl = Read-Host -Prompt "Enter web url:"
$username = Read-Host -Prompt "Enter Username:"
$password = Read-Host -Prompt "Enter password" -AsSecureString
$ctx = New-Object Microsoft.SharePoint.Client.ClientContext($siteUrl)

# SharePoint Online
$credentials = New-Object Microsoft.SharePoint.Client.SharePointOnlineCredentials($username, $password)
$ctx.Credentials = $credentials

$rootWeb = $ctx.Web
$ctx.Load($rootWeb)
$actions = $rootWeb.get_userCustomActions()
$ctx.Load($actions)
$ctx.ExecuteQuery()
if($actions)
{
$actionsToDelete = @()

foreach($action in $actions)
{
if($action.get_description() -eq $actionName -and $action.get_location() -eq $actionType) {

Write-Host "Action found:" $action.get_description() -foregroundcolor white -backgroundcolor Green
$actionsToDelete += $action

}
}

foreach($actionToDelete in $actionsToDelete) {
    $actionToDelete.deleteObject()
Write-Host "Action deleted" -foregroundcolor white -backgroundcolor Green
}
$ctx.ExecuteQuery()
}


Write-Host "Installing action"  -foregroundcolor white -backgroundcolor Green
$newAction = $actions.add();
$newAction.set_description($actionName);
$newAction.set_location('ScriptLink');
$scriptBlock = 'var headID = document.getElementsByTagName("head")[0];var newScript = document.createElement("script");newScript.type = "text/javascript";newScript.src="';
$scriptBlock += $actionSourceFile + '?ver=' + (Get-Date);
$scriptBlock += '";headID.appendChild(newScript);';
$newAction.set_scriptBlock($scriptBlock);
$newAction.update();
$ctx.ExecuteQuery();

Write-Host "Action" $newAction.Description "installed" -foregroundcolor white -backgroundcolor Green

Sunday, May 21, 2017

Designing SharePoint Server 2016 farm in MS Azure

step by step process to design Microsoft Azure infrastructure services to host SharePoint Server 2016 farms

SharePoint Server 2016 farms in Azure infrastructure services


Below are the few advantages of running SharePoint Server 2016 farms in any Infrastructure as a Service (IaaS) environment :
  • Partial outsourcing.
  • On demand capacity and the ability to scale virtual machines up (elasticity).
  • Minimal investment on additional locations.
  • Cost savings
Below are the scenarios in which SharePoint farms should be run from an IaaS environment:

  • Dev/test, pilot, or proof-of-concept farm
  • Hybrid infrastructure
  • Disaster recovery (DR)
  • Production farm

The Azure infrastructure services environment is different than on-premises data centers and requires additional planning. The following design process steps you to determine the elements of Azure infrastructure:
  1. Resource groups
  2. Connectivity
  3. Storage
  4. Identity
  5. Security
  6. Virtual machines

Step 1: Resource groups

Resource groups are containers for multiple Azure elements that can be managed together. For example, you can create access control lists that allow only specific user accounts to modify the set of elements in a resource group.
You can place all of the resources for your SharePoint Server 2016 farm in the same resource group, but this is highly discouraged for production deployments. Instead, the recommendation is to use different resource groups for:
  • Infrastructure and networking components
    For example, a resource group called Networking_RG that contains the virtual network (VNet), network security groups, and load balancers.
  • The separate roles of the SharePoint farm
    For example, use separate resource groups for the front-end, search, application, distributed cache, data, and combined roles of a typical SharePoint Server 2016 farm. In each separate resource group, place the availability sets, storage accounts, network interfaces, and virtual machines of that role.

Step 2: Connectivity

Connectivity includes:
  • Access to the servers running in your SharePoint Server 2016 farm, both for administration and for the resources of the farm, from your intranet and the Internet.
  • Access for the servers of the farm to each other, to the intranet, and to the Internet.
The elements of connectivity include virtual networks (VNets), the subnets within VNets, Domain Name System (DNS) for name registration and resolution, traffic distribution, and addressing for virtual machines.

VNets

The required container for virtual machines in Azure infrastructure services is the Azure VNet. There are two types of VNets:
  • Cloud-only
    Has no connection to an on-premises network. Use this type of VNet when you are deploying an Internet-facing SharePoint farm that uses a standalone Windows Server Active Directory (AD) forest.
  • Cross-premises
    Has a connection to an on-premises network and must be assigned a unique address space from your intranet. Use this type of VNet when you are deploying an intranet-based SharePoint farm that uses an on-premises Windows Server AD forest.
Although it is possible to place the VMs of a server role of a SharePoint farm in different VNets, this is highly discouraged because network traffic between VMs would have to travel across a VNet-to-VNet or VNet peering connection. The recommendation is to place all of the servers of a farm in a single VNet.
When you create the VNet, you must assign an address space to it, which can consist of one or multiple Classless Inter-Domain Routing (CIDR) blocks (also known as network prefixes). This is similar to assigning an address space to a new datacenter that will contain multiple subnets and IT workloads. The address space you choose depends on the type of VNet:
  • Cloud-only
    Can have any address space from the private IPv4 address space (10.0.0.0/8, 172.16.0.0/12, 192.168.0.0/16), if it does not overlap with the address spaces of other interconnected VNets.
  • Cross-premises
    Must be a unique, non-overlapping address space from your intranet address space, which can include public and private address spaces.
Subnets
Just like the subnets in your datacenter, subnets of an Azure VNet are logical divisions of the IPv4 address space to group and separate network nodes and their traffic. Azure supports three types of subnets:
  • VM-hosting (required)
    Hosts the VMs of an IT workload. An example is all of the servers running the distributed cache service of a SharePoint Server 2016 farm.
  • Gateway
    Hosts the Azure gateways for a cross-premises or VNet-to-VNet VPN connection. This subnet must be named “GatewaySubnet”.
  • Management (recommended)
    Hosts two or more VMs that provide remote desktop connections to the servers in the VNet and support network management functions.
Just like your on-premises datacenters, the recommendation in Azure is to use a separate VM-hosting subnet for each set or VMs providing the same server role for your farm. With separate subnets, you can use Azure network security groups to define the allowed inbound and outbound traffic and perform subnet isolation.
The address space for each subnet must be a portion of the VNet address space expressed as a single CIDR block, also known as a network prefix. Choose enough address space to accommodate the projected set of servers running that common server role.


Number of serversLength of the network prefix
1-3
/29
4-11
/28
12-27
/27
18-59
/26

DNS
All VMs in an Azure VNet by default are assigned a set of DNS servers to perform name registration and resolution. You can override this by assigning DNS servers to individual VM network interfaces.
For a SharePoint Server 2016 farm in Azure that contains a set of Windows Server AD domain controllers that are also acting as DNS servers, assign the IP addresses of the domain controllers as the DNS servers.
For a cross-premises VNet, you need two sets of DNS servers:
  • A set of DNS servers on your on-premises network that your domain controller VMs use when they join the domain and are promoted to domain controllers.
  • After the VMs have become DNS servers, you reset the DNS servers to the IP addresses of the domain controllers.
Traffic distribution
Typical production SharePoint farms use load balancers to distribute traffic among the servers of a common role. Azure infrastructure services include a built-in load balancer that can be used in the following ways:
  • Internet-facing: Used in conjunction with a public IP address to distribute incoming Internet traffic to the VM members of a load balanced set.
  • Internal: Used in conjunction with an IP address of a subnet in the VNet to distribute incoming Internet traffic to the VM members of a load balanced set.
Here are the recommendations for using Azure load balancers in your SharePoint Server 2016 farm in Azure:
  • Use the Azure load balancer or a load balancer network appliance for your front-end servers. If the SharePoint farm is designed to be accessible from the Internet, use an Internet-facing load balancer.
  • Use an internal Azure load balancer or a load balancer network appliance for the set of servers running applications and for the SQL server cluster (using the listener IP address).
  • Create the Azure load balancers or load balancer network appliances in the infrastructure or networking resource group.
  • Increase idle connection timeout to handle long duration connections from SharePoint clients with the Set-AzureLoadBalancedEndpoint –IdleTimeoutInMinutes 15 Azure PowerShell command.
  • The VM health probe can either be an HTTP get message or an ICMP Echo Request (ping) message, unless the load balancing network appliance is operating at layer 4, in which case an HTTP get message should be used.
Static addresses
You can assign static IP addresses to VM network interfaces from the available subnet address space. If you are using an internal Azure load balancer to distribute traffic among the servers of a common role, assign the load balancer a static IP address from the subnet containing the members of the load balanced set.
For a SharePoint Server 2016 farm in Azure, Microsoft recommends that you assign a static IP address for each server running SQL Server or SharePoint Server 2016.

Public IP addresses
A public IP address allows access to a load balancer or VM from the Internet. To reduce the surface area for malicious attacks, Microsoft recommends that you use public IP addresses only for the following:
  • For jumpbox VMs in a cloud-only network.
    A jumpbox VM is a VM from which you initiate remote desktop connections to remotely manage the other VMs in the VNet. You do not need public IP addresses for each VM.
  • For an Internet-facing load balancer for externally-facing farms.
    The public IP address provides access to the servers in the front-end role of the farm.
Azure assigns public IP addresses at the time they are requested for the VM or load balancer.

Step 3: Storage

Storage resources for VMs in Azure, which include the disks that each VM uses, need to be assigned to a storage account based on the following recommendations:
  • Create a separate storage account for each VM and store all of the disks for a VM in that storage account.
  • Create a separate storage account for VM diagnostics.
  • Place the storage accounts in the resource group for the server role to which the VM belongs.
Azure supports standard and premium types of storage. To be in a supported configuration, you must use premium storage for the servers running SharePoint Server 2016 that host the search role. Microsoft recommends that you use premium storage for all VMs running SQL Server or SharePoint Server 2016. Other VMs in the farm, such as domain controllers and the VMs on the management subnet, can use standard storage.

Step 4: Identity
SharePoint Server 2016 requires Windows Server AD domain membership. Therefore, a SharePoint Server 2016 farm in Azure must have access to VMs acting as domain controllers.
  • For an Internet-only farm in a cloud-only VNet, create a standalone Windows Server AD forest with at least two VMs for availability.
  • For an intranet farm in a cross-premises VNet, you can use on-premises domain controllers. However, Microsoft recommends using at least two replica domain controllers for the on-premises Windows Server AD forest in the VNet containing the SharePoint farm.

Step 5: Security

Use the following elements of Azure to provide security for the servers of the SharePoint farm:
  • For cloud-only VNets, use a jumpbox VM for remote desktop connections and assign the only public IP address to the jumpbox VM. Jumpbox VMs are optional for cross-premises VNets because the VMs of the SharePoint farm can be reached directly from the intranet.
  • Use subnet-based network security groups for subnet isolation. Network security groups and then the rules that define the traffic allowed into and out of the subnet. Place the network security groups in the resource group for infrastructure or networking components.
Step 6: Virtual machines

For the virtual machines of the SharePoint farm, do the following:
  • Create an availability set for each set of VMs in a common role and place all of the VMs with the same server role in it.
  • Create the availability set in the resource group for the server role.
  • Use a minimum of two VMs for each server role.
  • If you are using SQL Server AlwaysOn Availability Groups and plan to use only two SQL servers, you must also use minority node server for the cluster.
  • Place the network interfaces and the VMs in the resource group for the server role.
Here are the minimum recommended VM sizes:
  • Windows Server AD domain controllers: Standard_D2
  • SQL Servers: Standard_DS4
  • Minority node server: Standard_D2
  • SharePoint servers: Standard_DS4
Addresses for network interfaces:
  • Use static private IP addresses for all interfaces of VMs that are domain controllers or running SharePoint Server 2016 or SQL Server.
  • Use a public IP address only for the jumpbox VM.
  • Use a public IP address for the Internet-facing load balancer for the front-end servers if the farm is exposed to the Internet.
Each Azure VM includes an operating system disk. You can add extra disks when you create the VM or add them later. Use the following table for the minimum extra disks for the VMs in a SharePoint farm.


Type of serverExtra disks
Windows Server AD domain controllers
One 40 GB extra disk to store Windows Server AD information
SQL Servers
Three 1 TB extra disks for data, logs, and temporary data
Application or search servers
One 100 GB extra disk for logs, one 200 GB extra disk for the search index
Front-end or distributed cache servers
One 100 GB extra disk for logs
For the availability sets, fill in the following table before creating them, using as many rows as needed.


Availability set nameSharePoint farm roleResource group
For the network interfaces of VMs, fill in the following table before creating them, using as many rows as needed.


Network interface nameResource groupSubnet nameStatic IP addressLoad balancer instance (if needed)
For the VMs, fill in the following table before creating them, using as many rows as needed.


VM namePurposeSizeAvailability setResource groupNetwork interface name


Set-​Azure​Load​Balanced​Endpoint


Set-AzureLoadBalancedEndpoint
   [-ServiceName] <String>
   [-ACL <NetworkAclObject>]
   [-DirectServerReturn <Boolean>]
   [-IdleTimeoutInMinutes <Int32>]
   [-InformationAction <ActionPreference>]
   [-InformationVariable <String>]
   [-InternalLoadBalancerName <String>]
   -LBSetName <String>
   [-LoadBalancerDistribution <String>]
   [-LocalPort <Int32>]
   [-ProbeIntervalInSeconds <Int32>]
   -ProbePath <String>
   [-ProbePort <Int32>]
   [-ProbeProtocolHTTP]
   [-ProbeTimeoutInSeconds <Int32>]
   [-Profile <AzureSMProfile>]
   [-Protocol <String>]
   [-PublicPort <Int32>]
   [-VirtualIPName <String>]
   [<CommonParameters>]

Examples

Example 1: Modify the endpoints in a load balancer set

Set-AzureLoadBalancedEndpoint -ServiceName "JoAzureService" -LBSetName "LBSet1" -Protocol "TCP" -LocalPort 80 -ProbeProtocolTCP -ProbePort 8080

This command modifies all endpoints in the load balancer set named 'LBSet1' to use the TCP protocol and private port 80. The command sets the load balancer probe to use the TCP protocol on port 8080.

Example 2: Specify a different virtual IP

Set-AzureLoadBalancedEndpoint -ServiceName "JoAzureService" -LBSetName "LBSet2" -VirtualIPName "Vip1"

This command modifies the load balancer that has the load balancer set name to use a virtual IP named Vip1.

List of sites user has access in SharePoint Online


Getting a list of sites that a user has access to in SharePoint Online

My customer needed a way to show all the sites and site collection where the user had access. This is for an the sharepoint online site which they have. Since we cannot have any server side code and also looping through all sites and checking whether user has got access to the site is difficult.
So I came up with the option of using search api which is already security trimmed and based on contentclass, we can get the list. Below is the sample code for the same.
You can build your html and apply.
<button id='btnGetSites'>Get Sites</button>

<div id='list'>

</div>
<script src="https://tenant.sharepoint.com/sites/spdev/SiteAssets/jquery.min.js" type="text/javascript"></script>
<script type='text/javascript'>


(function(){
    var siteUrl = _spPageContextInfo.siteAbsoluteUrl;
    var url = siteUrl + "/_api/search/query?querytext='(contentclass:STS_Site)'";
    $('#btnGetSites').click(function(){
        console.log('start..');

        $.ajax({
            method: 'GET',
            url: url,
            dataType: 'json',
            success: success,
            error: error
        });

        function success(data){
            var html = '';

            $.each(data.PrimaryQueryResult.RelevantResults.Table.Rows, function(index, row){              
                var title = '';
                var url = '';
                $.each(row.Cells, function(i, obj){            
                    if(obj.Key === 'Title'){
                        html += obj.Value;
                    }
                    else if(obj.Key === 'Path'){
                        html += ": " + obj.Value + "<br/>";
                    }              
                });        
            });

            $('#list').append(html);
        }
        function error(err){
            console.log(err);
        }      
        return false;
    });

}());

</script>

Wednesday, May 17, 2017

Azure Active Directory B2C - Providing sign-up and sign-in to users with Microsoft Accounts

Create a Microsoft account application

To use Microsoft account as an identity provider in Azure Active Directory (Azure AD) B2C, you need to create a Microsoft account application and supply it with the right parameters. You need a Microsoft account to do this. If you don’t have one, you can get it at https://www.live.com/.
  1. Go to the Microsoft Application Registration Portal and sign in with your Microsoft account credentials.
  2. Click Add an app.
  3. Provide a Name for your application and click Create .
  4. Copy the value of Application Id. You will need it to configure Microsoft account as an identity provider in your tenant.
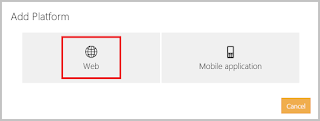
  5. Click on Add platform and choose Web.

  6. Enter https://login.microsoftonline.com/te/{tenant}/oauth2/authresp in the Redirect URIs field. Replace {tenant} with your tenant's name (for example, contosob2c.onmicrosoft.com).
  7. Click on Generate New Password under the Application Secrets section. Copy the new password displayed on screen. You will need it to configure Microsoft account as an identity provider in your tenant. This password is an important security credential.

  8. Check the box that says Live SDK support under the Advanced Options section. Click Save.

Configure Microsoft Account as an identity provider (IDP) in your tenant

  1. Follow these steps to navigate to the B2C features blade on the Azure portal.
  2. On the B2C features blade, click Identity providers.
  3. Click +Add at the top of the blade.
  4. Provide a friendly Name for the identity provider configuration. For example, enter "MSA".
  5. Click Identity provider type, select Microsoft account, and click OK.
  6. Click Set up this identity provider and enter the Application Id and password of the Microsoft account application that you created earlier.
  7. Click OK and then click Create to save your Microsoft account configuration.

Azure Active Directory B2C- Register your application

If you have the B2C features blade pinned to your Startboard, you will see the blade as soon as you sign in to the Azure portal as the Global Administrator of the B2C tenant.
You can also access the blade by clicking More services and then searching Azure AD B2C in the left navigation pane on the Azure portal.

Register a web application

  1. On the B2C features blade on the Azure portal, click Applications.
  2. Click +Add at the top of the blade.
  3. Enter a Name for the application that will describe your application to consumers. For example, you could enter "Jo B2C App".
  4. Toggle the Include web app / web API switch to Yes. The Reply URLs are endpoints where Azure AD B2C will return any tokens that your application requests. For example, enter https://localhost:38143/.
  5. Click Create to register your application.
  6. Click the application that you just created and copy down the globally unique Application Client ID that you'll use later in your code.
  7. If your web application will also be calling a web API secured by Azure AD B2C, you'll want to create an Application Secret by going to the Keys blade and clicking the Generate Key button.

Register a web api

  1. On the B2C features blade on the Azure portal, click Applications.
  2. Click +Add at the top of the blade.
  3. Enter a Name for the application that will describe your application to consumers. For example, you could enter "Jo B2C api".
  4. Toggle the Include web app / web API switch to Yes. The Reply URLs are endpoints where Azure AD B2C will return any tokens that your application requests. For example, enter https://localhost:38143/.
  5. Enter an App ID URI. This is the identifier used for your web API. For example, enter 'notes'. It will generate the full identifier URI underneath.
  6. Click Create to register your application.
  7. Click the application that you just created and copy down the globally unique Application Client ID that you'll use later in your code.
  8. Click on Published scopes. This is where you define the permissions (scopes) that can be granted to other applications.
  9. Add more scopes as necessary. By default, the "user_impersonation" scope will be defined. This gives other applications the ability to access this api on behalf of the signed-in user. This can be removed if you wish.
  10. Click Save.

Register a mobile/native application

  1. On the B2C features blade on the Azure portal, click Applications.
  2. Click +Add at the top of the blade.
  3. Enter a Name for the application that will describe your application to consumers. For example, you could enter "Jo B2C App".
  4. Toggle the Include native client switch to Yes.
  5. Enter a Redirect URI with a custom scheme. For example, com.onmicrosoft.jollsam.appname://redirect/path. 
  6. Click Save to register your application.
  7. Click the application that you just created and copy down the globally unique Application Client ID that you'll use later in your code.
  8. If your native application will also be calling a web API secured by Azure AD B2C, you'll want to create an Application Secret by going to the Keys blade and clicking the Generate Key button.

Choosing a redirect URI

There are two important considerations when choosing a redirect URI for mobile/native applications:
  • Unique: The scheme of the redirect URI should be unique for every application. In our example (com.onmicrosoft.jollsam.appname://redirect/path), we use com.onmicrosoft.jollsam.appname as the scheme. We recommend following this pattern. If two applications share the same scheme, the user will see a "choose app" dialog. If the user makes an incorrect choice, the login will fail.
  • Complete: Redirect URI must have a scheme and a path. The path must contain at least one forward slash after the domain (for example, //jollsam/ will work and //jollsam will fail).

Build a Quick Start Application

Now that you have an application registered with Azure AD B2C, you can complete one of our quick-start tutorials to get up and running